Difference between revisions of "Simple Login setting"
Easyhorpak (talk | contribs) (Created page with "Simple Login system is a system that allows users to enable Hotspot easily and conveniently by filling in the name, surname, email, phone number, then press Login user will be...") |
Easyhorpak (talk | contribs) |
||
| Line 9: | Line 9: | ||
2. Click to manage Hotspot | 2. Click to manage Hotspot | ||
| + | [[File:Screenshot from 2019-07-29 12-01-48.png|800px|thumb|center]] | ||
| − | + | 3. Go to edit Hotspot | |
| − | + | [[File:Screenshot from 2019-07-29 12-01-12.png|800px|thumb|center]] | |
| − | |||
| − | [[File: | ||
4. Scroll to the '' Simple login '' menu according to the image. | 4. Scroll to the '' Simple login '' menu according to the image. | ||
Revision as of 12:44, 29 July 2019
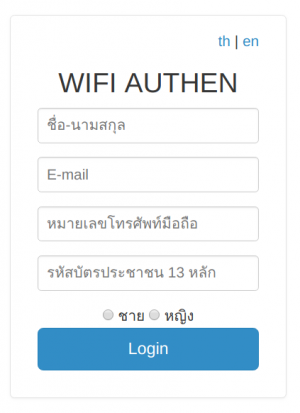
Simple Login system is a system that allows users to enable Hotspot easily and conveniently by filling in the name, surname, email, phone number, then press Login user will be able to use the internet immediately.
The method of setting is as follows.
1. Login to the Cloud system
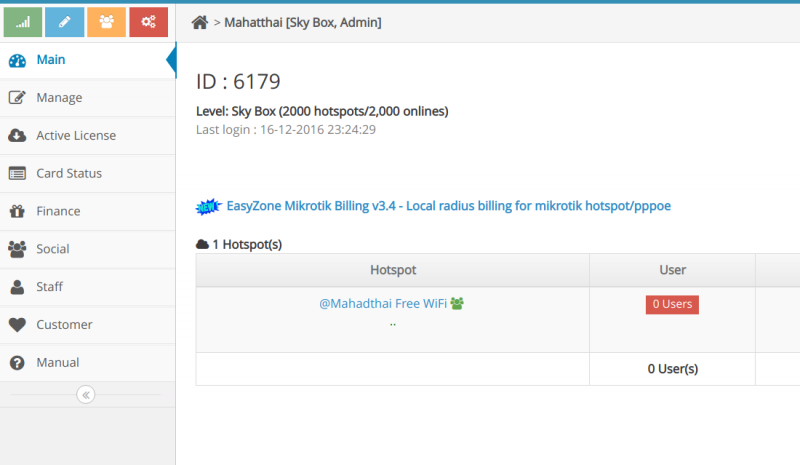
2. Click to manage Hotspot
3. Go to edit Hotspot
4. Scroll to the Simple login menu according to the image.
The setting details are as follows.
Enable simple login is a simple login option.
    Name is selected to display the name field.
    E-mail is selected to show the box to fill out the Email.
    Phone is selected to display the fill box. Telephone Number
    Card id is selected to display the fill box. ID card
    Gender is chosen to show the sex channel.
5. After that, scroll to the bottom and click Save.
6. If you want the user login automatically when using the second time, you must set up an authen gateway device such as mikrotik to have Mac authen function and create a Billing plan as Mac authen wiki / index.php /% E0% B8% 81% E0% B8% B2% E0% B8% A3% E0% B8% AA% E0% B8% A3% E0% B9% 89% E0% B8% B2% E0 % B8% 87% E0% B8% A3% E0% B8% B0% E0% B8% 9A% E0% B8% 9A_Mac_authen Mac authen system creation guide
7. Click on the Billing menu to create a plan for a simple user login type by filling in the name, plan, usage speed and duration of usage as needed.
After that, click on 'Advance setting' .
Set Authen Type to 'PAP' according to the picture.
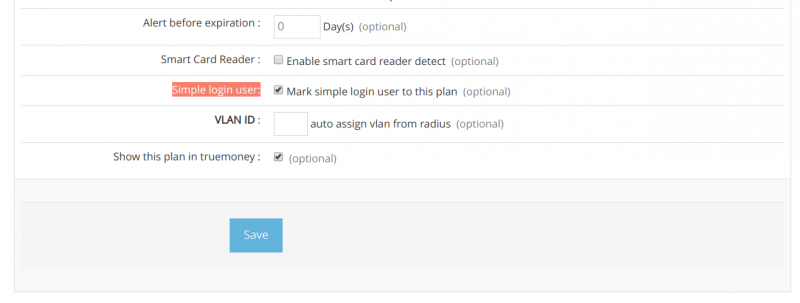
Scroll to the bottom to see the Simple login user 'menu. Select the check mark to create a billing plan.
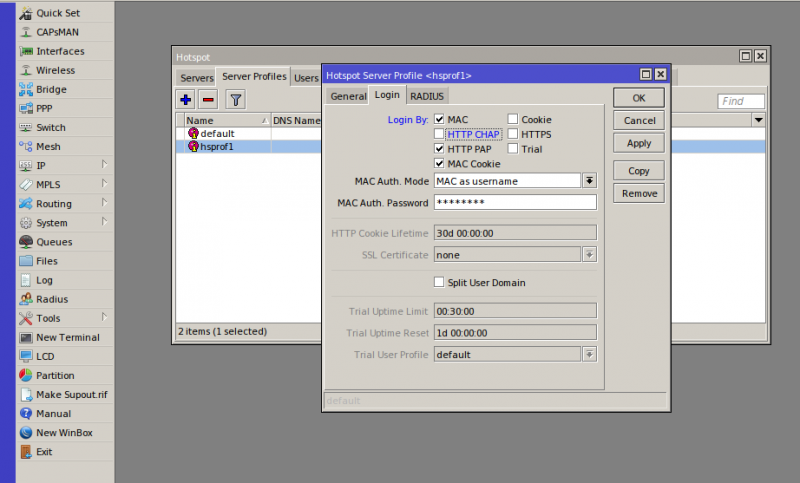
8. 'Mikrotik device setup is Login by HTTP PAP and Login by MAC' '
By logging in to Winbox and going to the IP menu> Hotspot> Server profile. Select Edit Hotspot Server profile as shown.
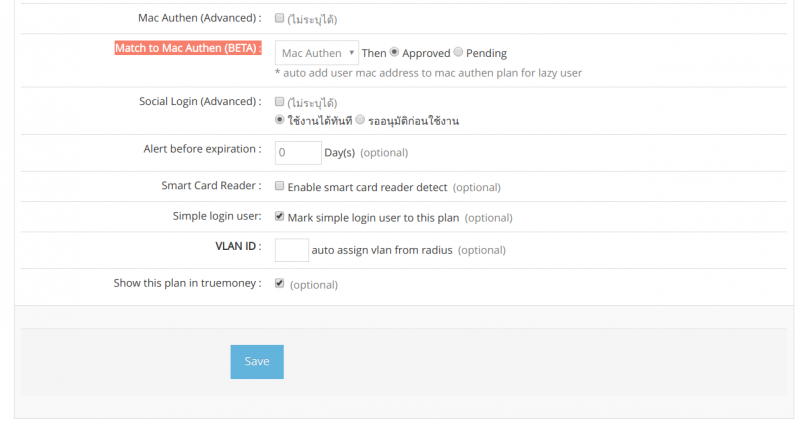
9. Make match billing plan with Mac authen plan in item 6 to allow the user to login automatically next time.
By going to the menu Match to Mac Authen 'choose plan mac authen, then click Save according to the picture and finish the setting process
