Difference between revisions of "Hotspot Card printing"
Easyhorpak (talk | contribs) (Created page with "You can print internet cards. By the following methods 1. Login to the Cloud system 2. Select Hotspot to print the card. 3. Select the card type menu File: C.png | 600px...") |
Easyhorpak (talk | contribs) |
||
| (One intermediate revision by the same user not shown) | |||
| Line 7: | Line 7: | ||
3. Select the card type menu | 3. Select the card type menu | ||
| − | [[File: | + | [[File:Screenshot from 2019-07-29 15-52-16.png|800px|thumb|center]] |
4. Select the card type | 4. Select the card type | ||
| Line 16: | Line 16: | ||
6. Scroll to the bottom to select the card type, with the following items to choose | 6. Scroll to the bottom to select the card type, with the following items to choose | ||
| − | [[File: | + | [[File:Screenshot from 2019-07-29 15-53-05.png|800px|thumb|center]] |
Latest revision as of 15:38, 29 July 2019
You can print internet cards. By the following methods
1. Login to the Cloud system
2. Select Hotspot to print the card.
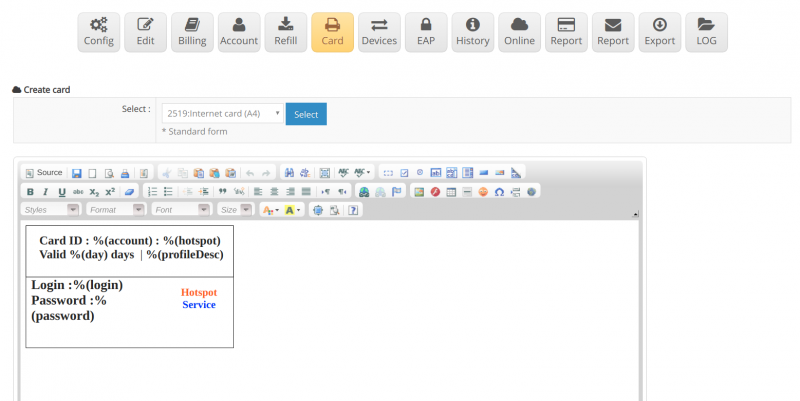
3. Select the card type menu
4. Select the card type
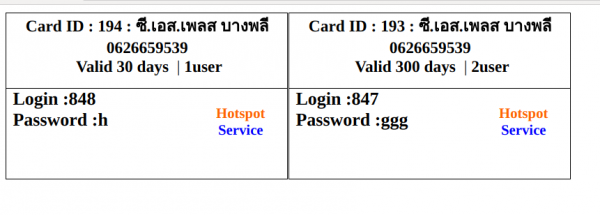
5. You can test the card by pressing preview internet card.
6. Scroll to the bottom to select the card type, with the following items to choose
Choose Billing Plan: is the billing plan that we want to print.
Card status: is the card status you want to print. Normal selection is not yet used.
Or from the card code: in case you want to specify card printing, select from this default code
To the card code: to this card code to determine the id range of the card you want to print
Number of rows: is the number of rows to be printed on 1 page
Number of columnists: is the number of columns To print on 1 page
7. After that, press the Print Internet Card button (A4).


