Difference between revisions of "คู่มือการใช้งาน Firmware KING I.T เชื่อมระบบ cloud"
From EasyZone wiki
Easyhorpak (talk | contribs) |
Easyhorpak (talk | contribs) |
||
| Line 2: | Line 2: | ||
1. ทำการลง firmware สำหรับ netgear r6220 ตามคู่มือ [https://bill.cloud-hotspot.com/wiki/index.php/%E0%B8%84%E0%B8%B9%E0%B9%88%E0%B8%A1%E0%B8%B7%E0%B8%AD%E0%B8%81%E0%B8%B2%E0%B8%A3%E0%B8%A5%E0%B8%87_firmware_%E0%B8%81%E0%B8%B1%E0%B8%9A_Netgear_R6220 คู่มือการลง firmware กับ Netgear R6220] | 1. ทำการลง firmware สำหรับ netgear r6220 ตามคู่มือ [https://bill.cloud-hotspot.com/wiki/index.php/%E0%B8%84%E0%B8%B9%E0%B9%88%E0%B8%A1%E0%B8%B7%E0%B8%AD%E0%B8%81%E0%B8%B2%E0%B8%A3%E0%B8%A5%E0%B8%87_firmware_%E0%B8%81%E0%B8%B1%E0%B8%9A_Netgear_R6220 คู่มือการลง firmware กับ Netgear R6220] | ||
| − | |||
| − | |||
2. ทำการเชื่อม ระบบ internet และ LAN ดังภาพ | 2. ทำการเชื่อม ระบบ internet และ LAN ดังภาพ | ||
Revision as of 15:39, 17 June 2019
มีวิธีการดังต่อไปนี้
1. ทำการลง firmware สำหรับ netgear r6220 ตามคู่มือ คู่มือการลง firmware กับ Netgear R6220
2. ทำการเชื่อม ระบบ internet และ LAN ดังภาพ
5. เมื่อเชื่อมอุปกรณ์ฝั่ง LAN และได้รับไอพี ให้ทดลองเข้าเว็บ เช่น เว็บ http://www.sanook.com
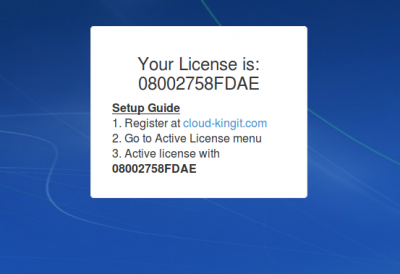
6. ระบบจะแสดง License ดังภาพ ให้ท่านทำการแจ้ง license มา ยังทีมงาน EasyZone (LINE ID : easyzone) ทางทีมงานจะเปิดระบบ License ให้ท่าน
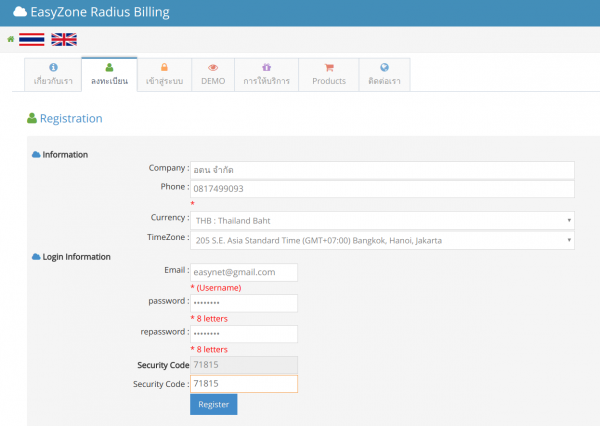
7. ทำการลงทะเบียนระบบ cloud ที่ https://www.cloud-hotspot.com
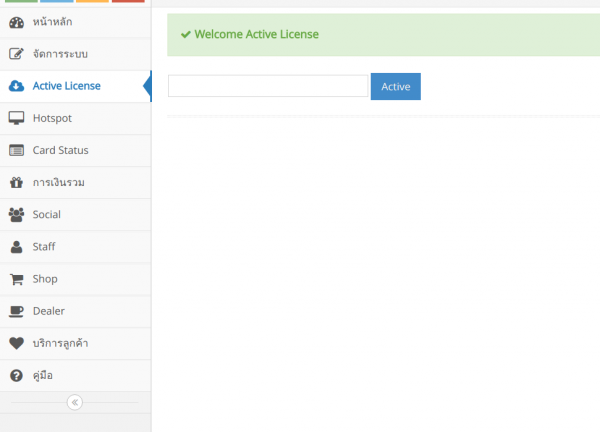
8. ทำการ Login และเข้าสู่ระบบ Cloud แล้วไปที่เมนู Active License
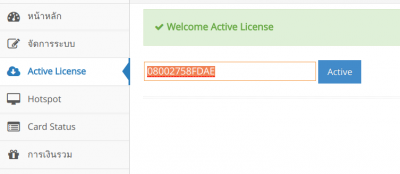
9. ทำการกรอกข้อมูล License ของท่าน และกด Active License
10. เป็นอันเสร็จขั้นตอนการใช้งาน EasyZone Cloud Router เชื่อมระบบ cloud (คู่มือการใช้งาน EasyZone Radius Billing (Cloud))


