Difference between revisions of "การเปิดเว็บใหม่ thai-school.net"
From EasyZone wiki
Easyhorpak (talk | contribs) |
Easyhorpak (talk | contribs) |
||
| (6 intermediate revisions by the same user not shown) | |||
| Line 5: | Line 5: | ||
2.เลือกเมนูเข้าสู่ระบบ | 2.เลือกเมนูเข้าสู่ระบบ | ||
| − | [[File: | + | [[File:Screenshot 2020-11-10 14.04.24.png|800px|thumb|center]] |
3.กรอกE-mailและpassword กดปุ่มฉันไม่ใช่โปรแกรมอัตโนมัติ | 3.กรอกE-mailและpassword กดปุ่มฉันไม่ใช่โปรแกรมอัตโนมัติ | ||
| − | [[File: | + | [[File:Screenshot 2020-11-10 13.51.59.png|800px|thumb|center]] |
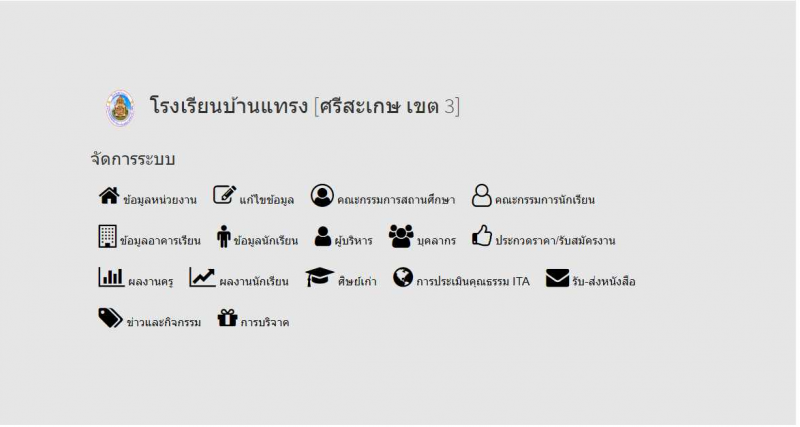
4.เลือกเมนูจัดการ | 4.เลือกเมนูจัดการ | ||
| − | [[File: | + | [[File:Screenshot 2020-11-10 13.52.49.png|800px|thumb|center]] |
| − | 5. | + | 5.เลือกเมนูผู้บริหาร |
| − | [[File: | + | [[File:Screenshot 2020-11-10 14.07.26.png|800px|thumb|center]] |
| − | 6. | + | 6.เลือกเมนูเพิ่มข้อมูล |
| − | [[File: | + | [[File:Screenshot 2020-11-10 14.22.37.png|800px|thumb|center]] |
| + | |||
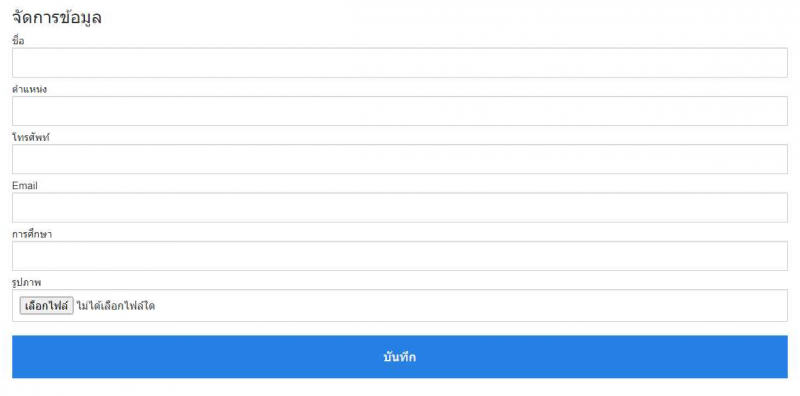
| + | 7.เพิ่มรายละเอียดตามที่กำหนด กดบันทึกเป็นอันเสร็จ | ||
| + | [[File:Screenshot 2020-11-10 14.21.08.png|800px|thumb|center]] | ||
Latest revision as of 14:15, 10 November 2020
มีวิธีการดังต่อไปนี้
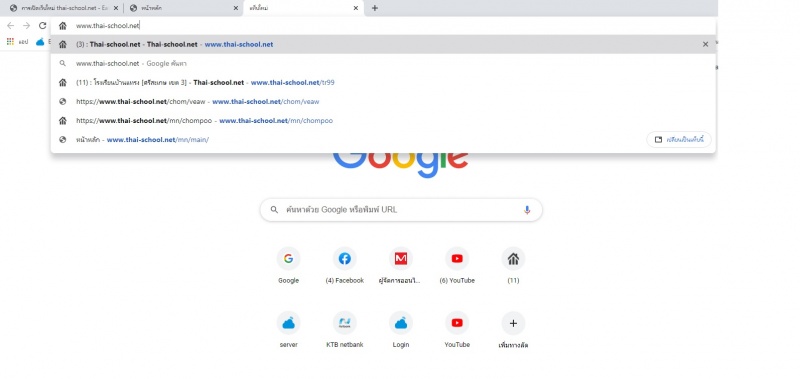
1เปิดเว็บบราเซอร์พิมพ์ www.thai-school.net
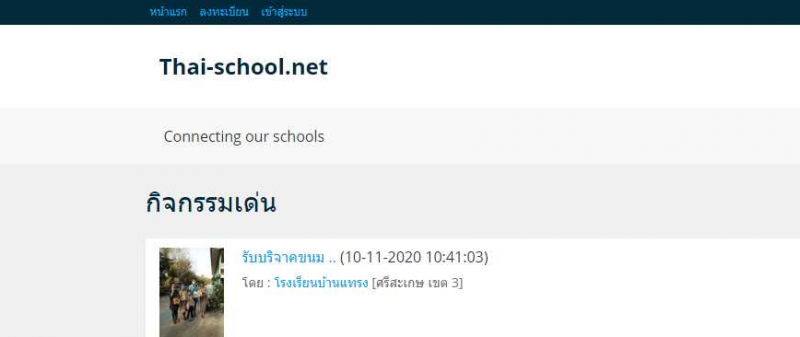
2.เลือกเมนูเข้าสู่ระบบ
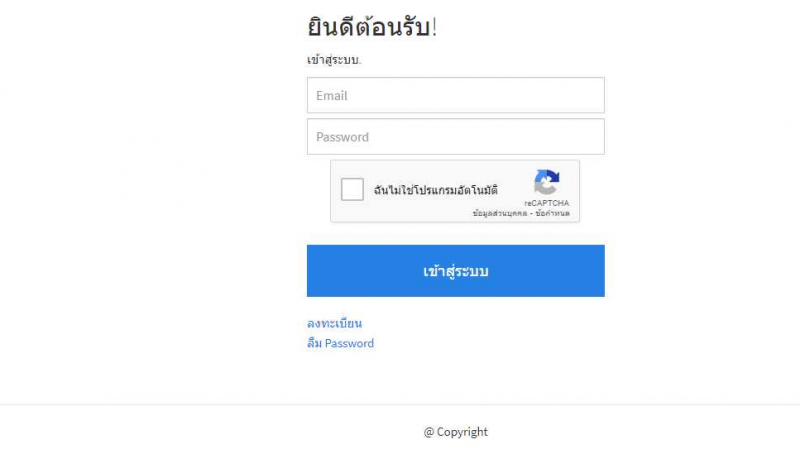
3.กรอกE-mailและpassword กดปุ่มฉันไม่ใช่โปรแกรมอัตโนมัติ
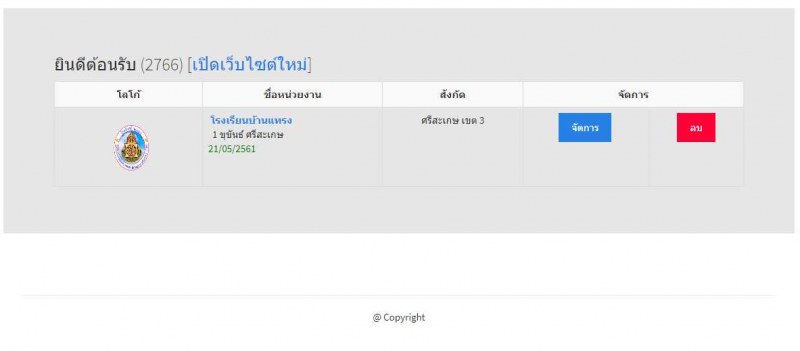
4.เลือกเมนูจัดการ
5.เลือกเมนูผู้บริหาร
6.เลือกเมนูเพิ่มข้อมูล
7.เพิ่มรายละเอียดตามที่กำหนด กดบันทึกเป็นอันเสร็จ
