Difference between revisions of "คู่มือการใช้งาน Firmware KING I.T เชื่อมระบบ cloud"
From EasyZone wiki
Easyhorpak (talk | contribs) |
Easyhorpak (talk | contribs) |
||
| Line 8: | Line 8: | ||
| − | + | 3. เมื่อเชื่อมอุปกรณ์ฝั่ง LAN และได้รับไอพี ให้ทดลองเข้าเว็บ เช่น เว็บ http://www.ok.com | |
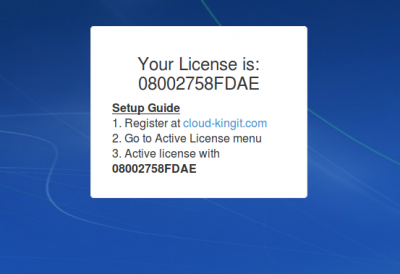
| − | + | 4. ระบบจะแสดง License ดังภาพ | |
[[File:Key.png|400px|thumb|center]] | [[File:Key.png|400px|thumb|center]] | ||
| + | |||
| + | 5. ทำการเพิ่ม License เข้าระบบ Stock โดย login เข้าไปที่ https://www.cloud-kingit.com | ||
| + | |||
| + | กดที่เมนู Hardware License ตามภาพ | ||
| + | |||
| + | [[File:Screenshot from 2019-06-17 16-03-46.png|600px|thumb|center]] | ||
7. ทำการลงทะเบียนระบบ cloud ที่ https://www.cloud-hotspot.com | 7. ทำการลงทะเบียนระบบ cloud ที่ https://www.cloud-hotspot.com | ||
Revision as of 15:50, 17 June 2019
มีวิธีการดังต่อไปนี้
1. ทำการลง firmware สำหรับ netgear r6220 ตามคู่มือ คู่มือการลง firmware กับ Netgear R6220
2. ทำการเชื่อม ระบบ internet และ LAN ดังภาพ
3. เมื่อเชื่อมอุปกรณ์ฝั่ง LAN และได้รับไอพี ให้ทดลองเข้าเว็บ เช่น เว็บ http://www.ok.com
4. ระบบจะแสดง License ดังภาพ
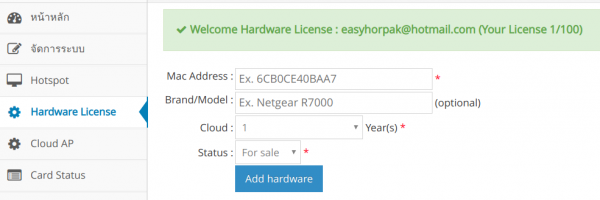
5. ทำการเพิ่ม License เข้าระบบ Stock โดย login เข้าไปที่ https://www.cloud-kingit.com
กดที่เมนู Hardware License ตามภาพ
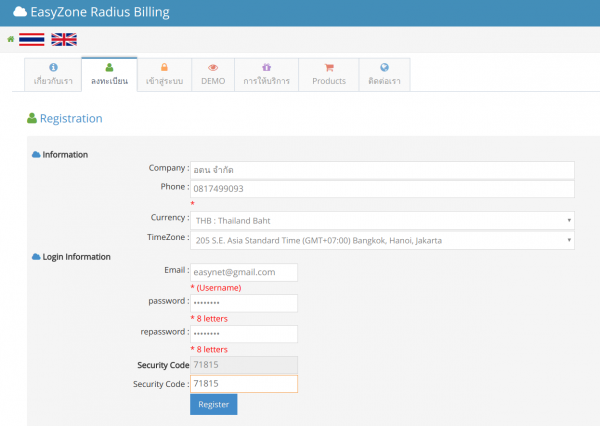
7. ทำการลงทะเบียนระบบ cloud ที่ https://www.cloud-hotspot.com
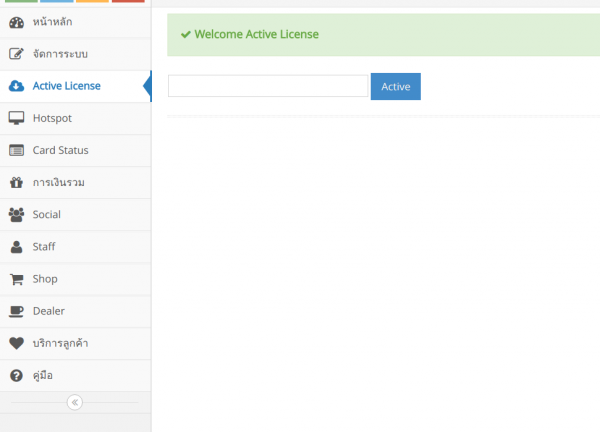
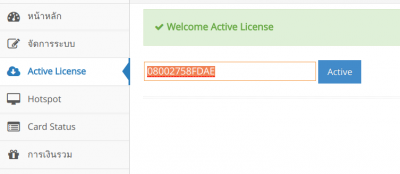
8. ทำการ Login และเข้าสู่ระบบ Cloud แล้วไปที่เมนู Active License
9. ทำการกรอกข้อมูล License ของท่าน และกด Active License
10. เป็นอันเสร็จขั้นตอนการใช้งาน EasyZone Cloud Router เชื่อมระบบ cloud (คู่มือการใช้งาน EasyZone Radius Billing (Cloud))

