Difference between revisions of "Mac authen setting"
From EasyZone wiki
Easyhorpak (talk | contribs) |
Easyhorpak (talk | contribs) |
||
| (One intermediate revision by the same user not shown) | |||
| Line 10: | Line 10: | ||
3. Click to enter the Billing menu. | 3. Click to enter the Billing menu. | ||
| − | [[File: | + | [[File:Screenshot from 2019-07-29 12-24-44.png|800px|thumb|center]] |
4. Choose to create a Billing plan. Here you will set up the billing plan. 365 days. Determine the mac authen. | 4. Choose to create a Billing plan. Here you will set up the billing plan. 365 days. Determine the mac authen. | ||
| Line 27: | Line 27: | ||
Price: Not required | Price: Not required | ||
| − | [[File: | + | [[File:Screenshot from 2019-07-29 14-39-25.png|800px|thumb|center]] |
5. Press the Advance setting button | 5. Press the Advance setting button | ||
| Line 33: | Line 33: | ||
Mac Authen (Advanced): check mark | Mac Authen (Advanced): check mark | ||
| − | [[File: | + | [[File:Screenshot from 2019-07-29 15-02-44.png|800px|thumb|center]] |
6. Click '' Save ''. ' | 6. Click '' Save ''. ' | ||
Latest revision as of 14:48, 29 July 2019
Creating a mac authen billing plan to create a mac authen account for the device to use. Without having to open the web login page
The methods are as follows.
1. Login to the Cloud system
2. Select Hotspot to manage
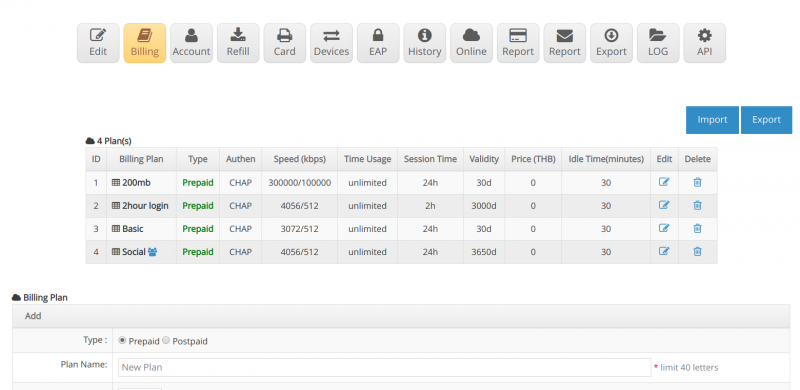
3. Click to enter the Billing menu.
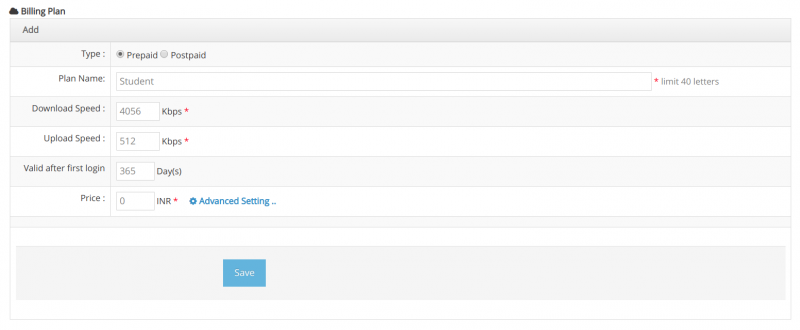
4. Choose to create a Billing plan. Here you will set up the billing plan. 365 days. Determine the mac authen.
Plan type: prepaid or postpaid
Plan name: name your plan
Download: Speed download
Upload: speed upload
Usage period: set the usage period, set to 365 days
Price: Not required
5. Press the Advance setting button
Mac Authen (Advanced): check mark
6. Click Save . '


