Difference between revisions of "SSL Certificate setting for Login by HTTPS on Mikrotik Hotspot Login"
Easyhorpak (talk | contribs) (Created page with "' 'Setting up SSL Certificate Login by HTTPS for Mikrotik Hotspot Login' '' '' 'Has the following methods' '' 1. Download the SSL Certificate file (EasyZone customers, pleas...") |
Easyhorpak (talk | contribs) |
||
| Line 36: | Line 36: | ||
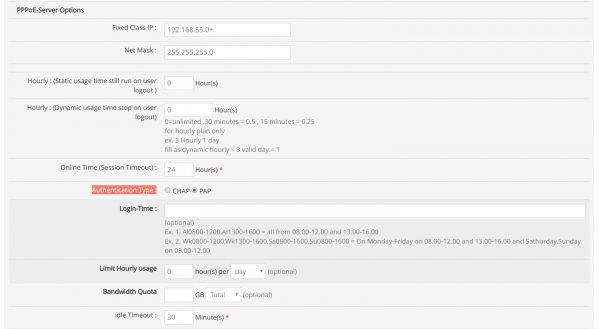
7. Login into the cloud system of easyzone and create a billing plan and set auth type to PAP in the billing menu> advance setting. After that, click Save and finish the setup process. | 7. Login into the cloud system of easyzone and create a billing plan and set auth type to PAP in the billing menu> advance setting. After that, click Save and finish the setup process. | ||
| − | [[File: | + | [[File:Screenshot from 2019-07-29 12-50-49.png|600px|thumb|center]] |
Revision as of 12:36, 29 July 2019
' 'Setting up SSL Certificate Login by HTTPS for Mikrotik Hotspot Login'
'Has the following methods'
1. Download the SSL Certificate file (EasyZone customers, please contact LINE ID: @easyzone)
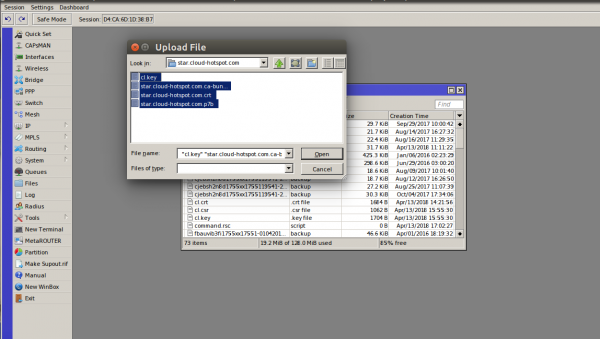
2. Upload files to mikrotk device via winbox
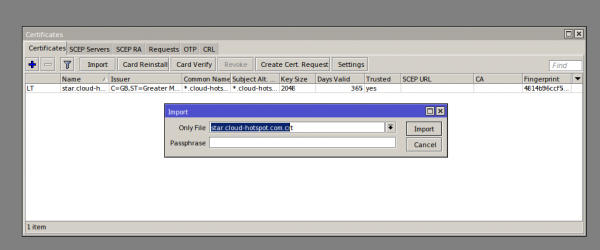
3. Import the certificate by going to menu / system> certificates.
Choose file star.cloud-hotspot.com.crt, press Import
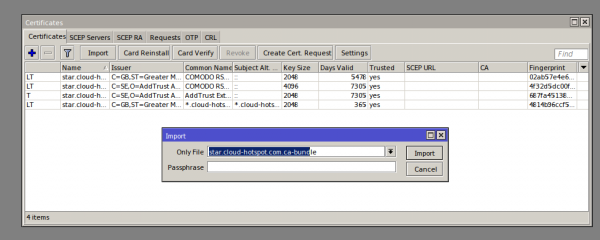
Choose file star.cloud-hotspot.com.ca-bundle
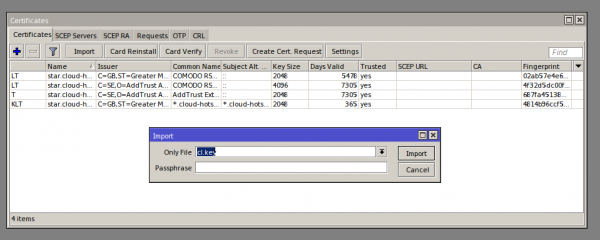
Select file cl.key
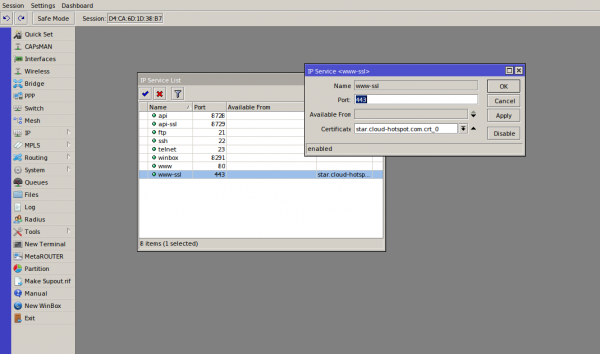
4. Set up service ssl 443 by going to ip> service menu. Select Certificate as picture. After that, press OK.
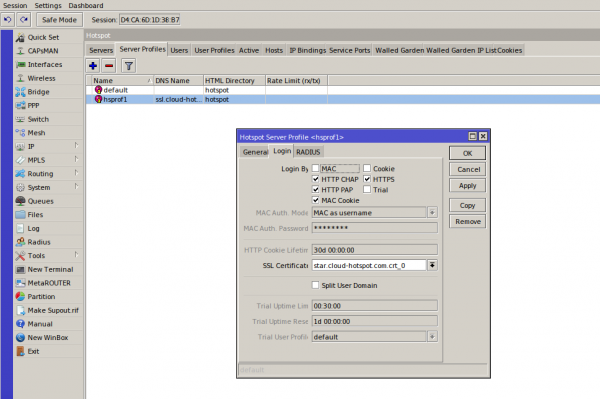
5. Set up the login by https by going to the menu / ip> hotspot> server profile> select profile and check the check by https and select the certificate as the picture. After that, press OK.
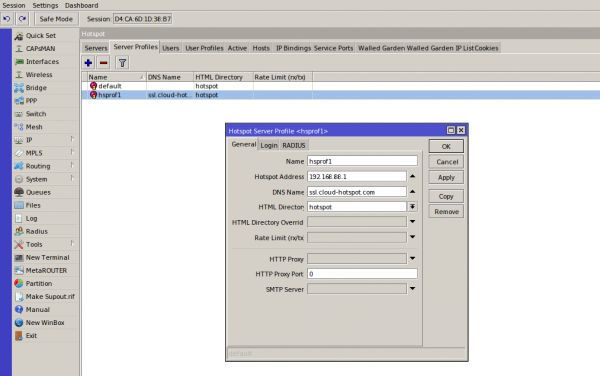
6. Set dns name to ssl.cloud-hotspot.com 'by going to menu / ip> hotspot> server profile> general> dns name as shown.
7. Login into the cloud system of easyzone and create a billing plan and set auth type to PAP in the billing menu> advance setting. After that, click Save and finish the setup process.
