Difference between revisions of "Setting up EAP Authentication for Ruijie Cloud Controller"
From EasyZone wiki
Easyhorpak (talk | contribs) (Created page with "The method is as follows. 1. Login to the Cloud Controller system 2. Click on the Configuration menu. 3. Press the + button on the web page to add SSID. File: Screenshot...") |
Easyhorpak (talk | contribs) |
||
| Line 33: | Line 33: | ||
[[File: Screenshot from 2020-11-05 11-42-54.png | 800px | thumb | center]] | [[File: Screenshot from 2020-11-05 11-42-54.png | 800px | thumb | center]] | ||
| − | 10. Send the Mac address of the Access Point to the | + | 10. Send the Mac address of the Access Point to the EasyZone Team to add to the Cloud EAP system. |
Latest revision as of 11:53, 5 November 2020
The method is as follows.
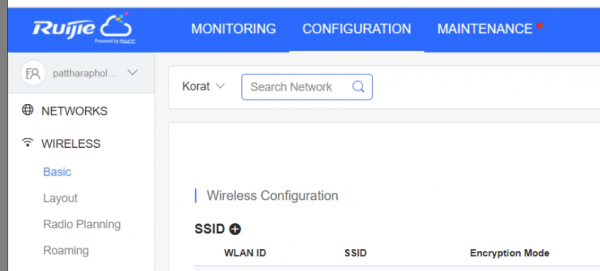
1. Login to the Cloud Controller system
2. Click on the Configuration menu.
3. Press the + button on the web page to add SSID.
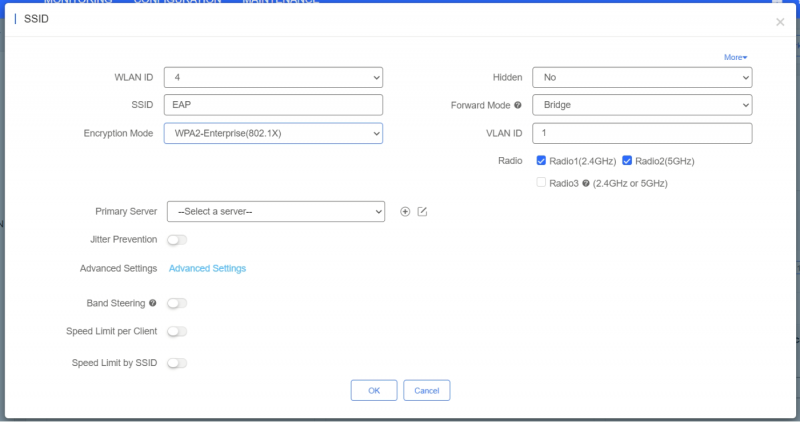
4.Enter the SSID you want and select Encryption Mode as WPA2-Enterprise (802.1x).
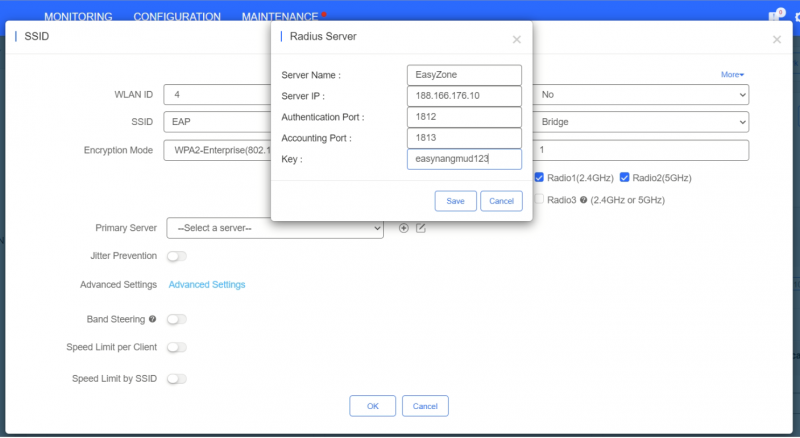
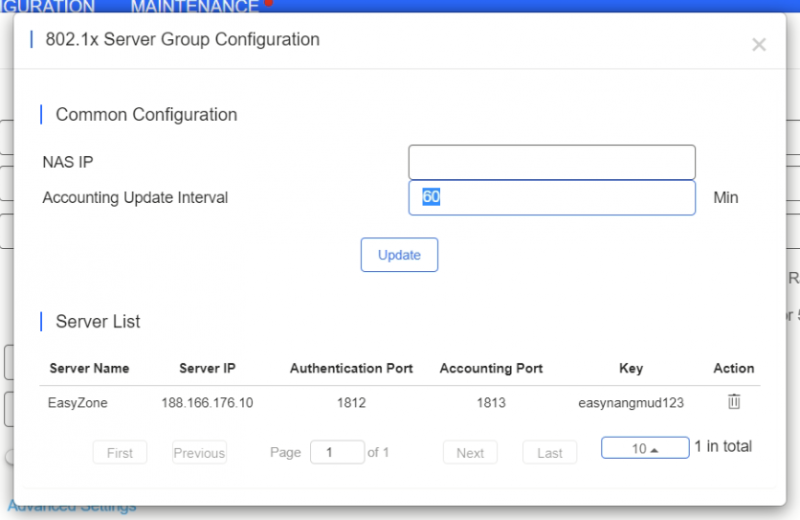
5. At the Primary Server menu, press the + button on the web page to add the server information as the picture and press Save.
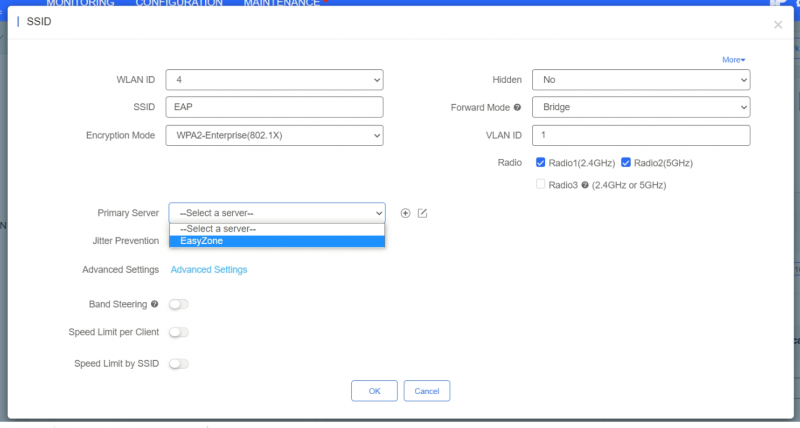
6. Select Server
7. Press Advance Setting menu, edit Accounting Update Interval to 60 ms as shown, then press Update.
8. After that press Ok.
9. Press the menu Save to complete the setting process.
10. Send the Mac address of the Access Point to the EasyZone Team to add to the Cloud EAP system.
