Difference between revisions of "การตั้งค่า EAP Authentication"
From EasyZone wiki
Easyhorpak (talk | contribs) |
Easyhorpak (talk | contribs) |
||
| Line 11: | Line 11: | ||
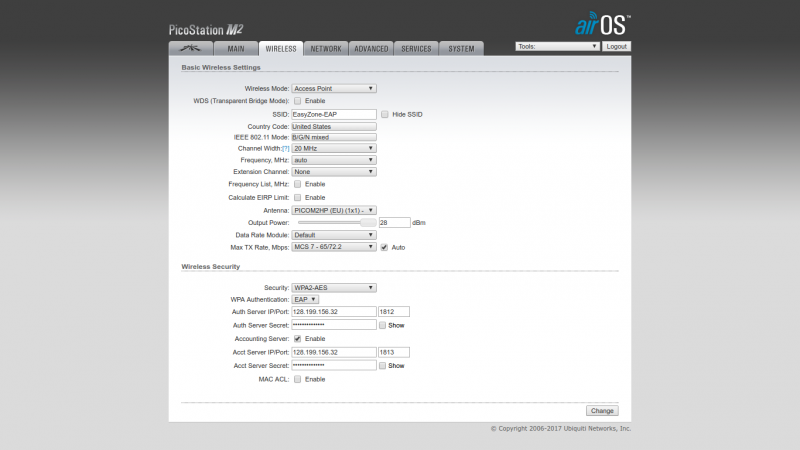
[[File:Easyzone-eap-setting.png|800px|thumb|left|EasyZone EAP Authentication Setting]] | [[File:Easyzone-eap-setting.png|800px|thumb|left|EasyZone EAP Authentication Setting]] | ||
| − | <BR><BR> | + | <BR><BR><BR><BR><BR><BR><BR><BR> |
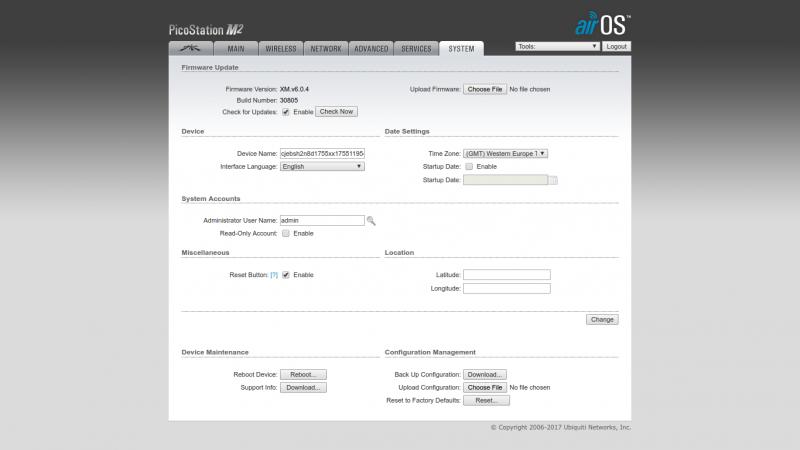
2. ทำการตั้งค่า Device Name : ตามค่า Hotspot ของท่าน | 2. ทำการตั้งค่า Device Name : ตามค่า Hotspot ของท่าน | ||
| − | [[File:Easyzone-eap-deivce-name-setting.png|800px|thumb|left|EasyZone EAP Authentication Setting]] | + | [[File:Easyzone-eap-deivce-name-setting.png|800px|thumb|left|EasyZone EAP Authentication Device name Setting]] |
Revision as of 11:45, 17 May 2017
การตั้งค่า EAP Authentication
เพื่อความสะดวกในการใช้งานของลูกค้าระดับองกรค์ ที่ไม่ต้องการใช้งานระบบ Web authen ท่าสามรถตั้งค่าการ EAP Authentication ตามคู่มือด้านล่าง
1.ตั้งค่าอปุกรณ์ Access Point ของท่านแบบ WPA2 EAP
(ในที่นี้ใช้อุปกรณ์ Ubiquiti Pico Station M Firmware v6.0.4 ดาวโหลดน์ได้ที่ https://www.ubnt.com/download/airmax-m/picostationm)
เข้าไปที่เมนู Wireless ตั้งค่าตามภาพ
2. ทำการตั้งค่า Device Name : ตามค่า Hotspot ของท่าน

